Capturing the Fragrance and Flavor of Winter

Nut Extracts
The spring thaw is upon us.  The icebergs are melting, the sidewalks are passable again and the smell of thawing earth and sap rising are in the air. This time of year is always a little melancholy for me. I love winter, no matter the cold and snow, I love it. I'm a big fan of warm and cozy.  I love the holidays, love snow days, thick blankets, warm stews and soft cashmere sweaters (and socks, cashmere socks are the best). I'm going to miss it in the long warm, muggy, glaring, big, fat summer ahead.  Most people talk about capturing the flavors of summer to be used during the cold, lean months.  I do my share of that, mostly so that I can enjoy the winter that much more, but just to turn things on their ear I've been trying to capture the flavors and fragrance of winter to be enjoyed during the summer.

What are the flavors I love most in winter?  That's easy.  Juicy, fresh citrus fruits, roasted nuts, and cups and cups and cups of milky black tea.  So that's what I've attempted to capture. I've made extracts of tangerine, blood orange, meyer lemon, vanilla/orange, toasted almond, hazelnut and pistachio and peach, blackcurrant and vanilla black tea.  Thinking ahead to chocolate ice cream with blood orange extract, or pistachio ice cream amped up with a bit of extract and glasses of cold seltzer with carbonated bubbles popping peach tea extract.

Drying orange zest
I've also started zesting my citrus before I peel them and drying the zest.  It's nice to have home cured rinds for recipes.  You can zest any type of orange, lemon or lime - or anything else you can get your hands on like yuzu or buddah's hand.  I lay them on parchment covered wicker trays but even laid out evenly on a dinner plate works. Leave them at least a week, depending on humidity, before you put them in a jar to keep. Make sure they're absolutely dry before you do, any hidden moisture could cause your rinds to mold.  On the other hand don't leave them out too long or they'll lose their potency. Don't forget to label them, you'll want to remember which is tangerine and which is blood orange, especially as they dry and their flavor concentrates.

Straining Meyer Lemon Extract
So, while it's still winter take advantage of the fruits of the season and keep them for the warm seasons to come.  If preparing them seems too mind-boggling and time consuming check out the selection of extracts in my Etsy store.  Everything is made in small batches so there is a limited supply. I love to tinker and experiment so expect some new arrivals.

To read more about making extracts at home look here.

Tea Extracts
Nut Extracts Sample Set
Tangerine Extract


Making Extracts from Nuts, Citrus and Teas

I am fascinated by the extractive properties of alcohol.  Whatever it comes in contact with is transferred to it.  My friend Nata of Nata's Cocktails once referred to vodka as "the chicken of liquors". The same technique used to make herbal medicine, bitters, tinctures, colognes and flavored vodka also make extracts.

This winter has been a cold one, one of the coldest on record.  I'm not the happiest cook in the world but lately I've been cooking up all kinds of warming soups and stews.  But what actually makes me happy is baking and so I've turned my attention to creating extracts.

I started with vanilla, naturally.  I consume more vanilla than your average person, I add it to everything.  I did a lot of research and discovered that most homemade vanilla extract is quite weak. To legally be called extract it has to have six beans per cup of alcohol, otherwise you're just making vanilla flavored vodka.  Sliced, seeded and chopped up I let the six beans macerate for three months until it was a dark opaque and extraordnarily flavorful brew.

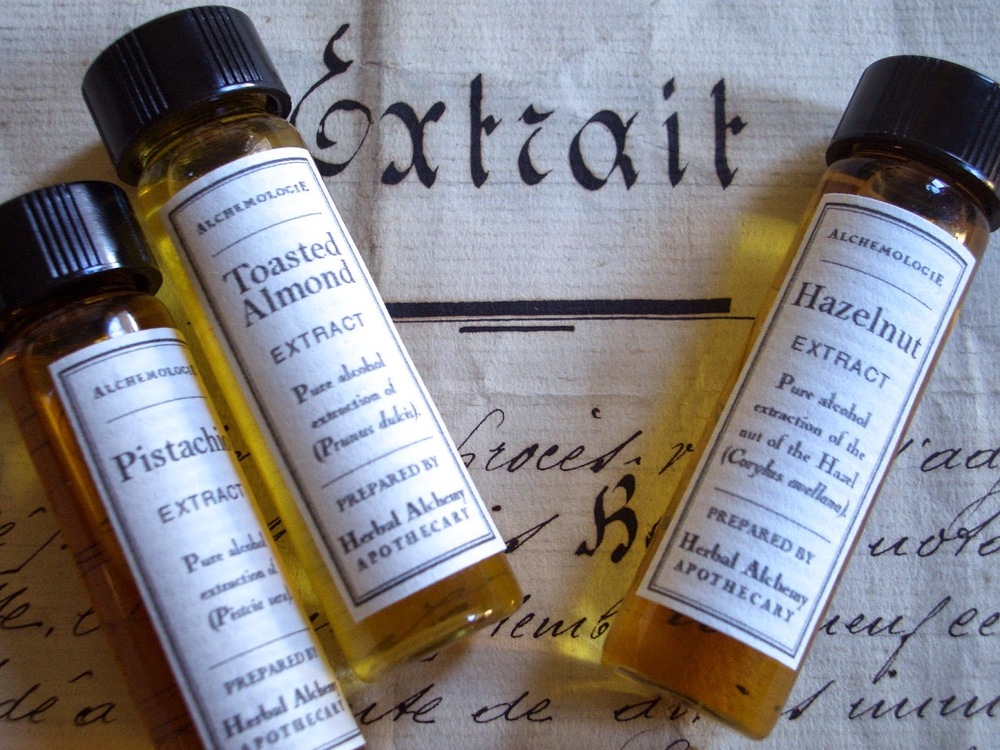
That got me started, once I hit on a good thing I want more.  I adore toasted hazelnuts so that was my next venture.  And why do only one nut when you can do three?  Toasted almond and pistachio made sense and I'm considering pecan.  I toasted the nuts, let them cool, chopped them up, put them in a clean jar and covered them with vodka.  The hazelnuts are a bit more complicated in that once you've toasted them you have to let them cool and rub off the skins.  It's a bit time consuming but totally worth it as the skins leave a bitter taste.  Leave to macerate for one to three months and then filter and clarify.

This winter I've discovered the joy of making my own nut milks.  It's so easy when you know how and there are instructions all over the internet.  I started with almond but gradually expanded into hazelnut, pistachio, cashew and coconut.  To the almond, hazelnut and pistachio I added their respective extract to bump up the flavor (and usually a bit of vanilla, too!).

Now that citrus season is in full swing I've turned my attention to citrus extracts. When they first came in season I couldn't get enough tangerines so that was the first extract I created.  I've got meyer lemon, blood orange and vanilla orange brewing. When I was a kid I adored creamsicles and still go crazy for that creamy orange and vanilla combination.  Simply zest whatever fruit you choose, place in a clean jar and cover with vodka.  Leave to macerate one to three months, strain and clarify.

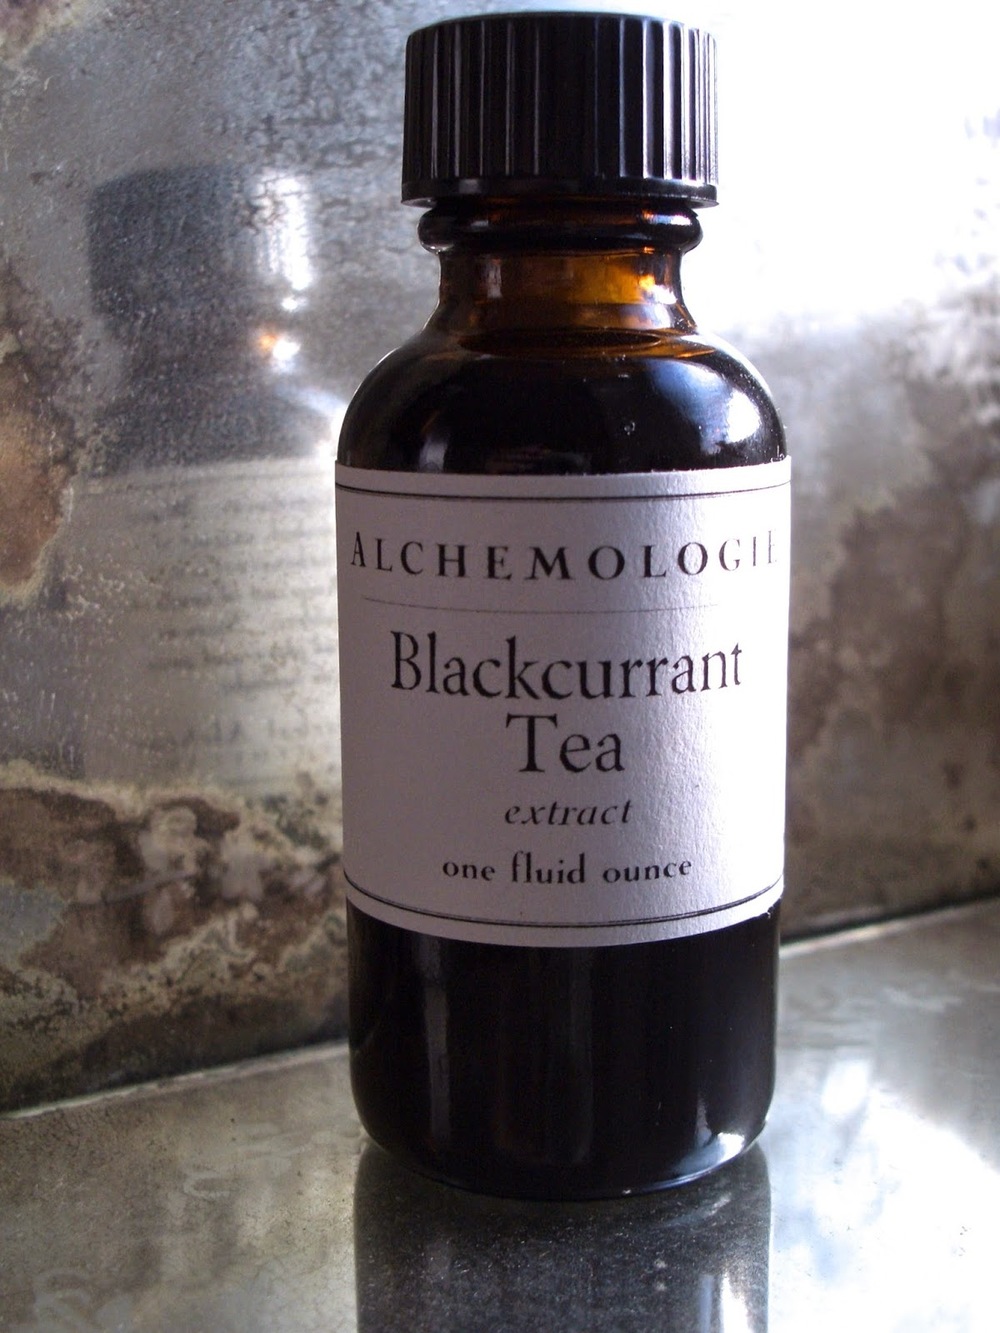
I love tea so created some extracts out of my favorites.  I drink a delicious all naturally flavored peach tea in the wintertime so created Peach Tea Extract.  I love it in seltzer.  As the bubbly glass approaches your nose the bubbles pop with perfumed tea fragrance.  It's truly sublime.  I've added Blackcurrant Tea as well.  Attempts at Jasmine and Russian Caravan were less successful but I'm still willing to try working those out.

I also have an abundance of chocolate mint growing in my garden.  I've flavored vodka with it in the past and was delighted by the results.  Tissane brewed of the mint is nice, minty with a bit of chocolate flavor, but when extracted in alcohol the chocolate flavor really comes through.  I have just a couple of bottles left, I'll have to wait until summer to create more.

Extracts are, of course, delicious in baked goods but the possibilities for other deserts are endless.  Ice cream comes to mind (but that's for a warmer season).  And whatever confection you decide to create don't forget to spike your whipped cream with some extra extracted kick.

To experiment with some of my flavorings check out my Etsy store.  Some of them are bottled in vintage extract bottles found on the beach.

The Bitters Experiment

After macerating for over six weeks I finally decanted my bitters and have been enjoying them in seltzer and cocktails.  I recently had a delicious Manhattan using Woodland Bitters, the brew adding a woodsy complexity to the libation.  I think the Cherry Hazelnut are my favorite and I look forward to another Manhattan using it.

Cherry Hazelnut Bitters

1/2 cup lightly toasted and skinned hazelnuts
1/2 cup dried tart or sour cherries
2 tablespoons devil's club root
1/2 teaspoon schizandra berries
1/2 teaspoon wild cherry bark
1/2 teaspoon cinchona bark
1/2 teaspoon cassia chips
1/4 teaspoon chopped dried orange peel
3 star anise
2 cups 101-proof bourbon, or more as needed

Macerate six weeks and decant.   The original recipe (taken from Brad Thomas Parsons wonderful book, "Bitters") suggests decanting after two weeks and retaining the solids to be boiled in one cup of water over high heat and returning the filtered water into the original brew.  He also suggests adding 2 tablespoons of rich syrup.  I found these extra steps tedious so just left it to macerate longer and I'm quite happy with the results.

Making Bitters

Edible Brooklyn, in their recent alcohol issue, said that everyone in Brooklyn has to make bitters, it's one of the rules.  It's true that I know an inordinate amount of people who make bitters (and beer, mead, hot sauce, play the ukelele, the accordion, etc.).  Bitters are a Very Big Thing in these parts and they're taken very seriously.

Traditionally they're considered medicine and used as a digestive tonic for the occasional upset of overeating.  In the Victorian era they found their way into cocktails.  Once the Manhattan was invented they were assured their place in every bartender's arsenal.

After doing a bit of research online I found a few recipes I wanted to try.  I was recommended to try the Dandelion Botanical Company for my bittering herbs and flavoring agents (I would also recommend Mountain Rose Herbs).  My intention was to follow a few recipes and then continue to experiment on my own.  The primary bittering herb is gentian root, the stuff that made Angostura so famous.  I also purchased chinchona bark, the principal ingredient in creating tonic water (another experiment for later), sarasparilla, devil's club root, black walnut leaf and wild cherry bark.  (The catalog had other things I just couldn't resist ordering including sandalwood powder, patchouli leaf and osmanthus flowers - yet another project).

The recipe I settled on, amongst others, was Woodland Bitters.  I loved the idea of the earthy devil's club root with wild cherry bark and toasted nuts.  I also made a classic Angostura style bitters as well as Cherry Hazelnut Bitters.  If I didn't think I'd be inundated with bitters for the rest of my life I'd be experimenting with many variations (figs, citrus, cranberry, wormwood, etc.), and it's nowhere near Christmas where I could at least hand them out as presents.

              Woodland Bitters
  1. 2 cups overproof bourbon (such as Wild Turkey 101)
  2. 1 cup pecans, toasted
  3. 1 cup walnuts, toasted
  4. 4 cloves
  5. Two 3-inch cinnamon sticks
  6. 1 whole nutmeg, cracked
  7. 1 vanilla bean, split
  8. 2 tablespoons devil's club root
  9. 1 tablespoon cinchona bark
  10. 1 tablespoon chopped black walnut leaf
  11. 1 tablespoon wild cherry bark
  12. 1/2 teaspoon cassia chips
  13. 1/2 teaspoon gentian root
  14. 1/2 teaspoon sarsaparilla root
  15. 3 tablespoons pure maple syrup
  1. In a 1-quart glass jar, combine all of the ingredients except the syrup. Cover and shake well. Let stand in a cool, dark place for 2 weeks, shaking the jar daily.
  2. Strain the infused alcohol into a clean 1-quart glass jar through a cheesecloth-lined funnel. Squeeze any infused alcohol from the cheesecloth into the jar; reserve the solids. Strain the infused alcohol again through new cheesecloth into another clean jar to remove any remaining sediment. Cover the jar and set aside for 1 week.
  3. Meanwhile, transfer the solids to a small saucepan. Add 1 cup of water and bring to a boil. Cover and simmer over low heat for 10 minutes; let cool completely. Pour the liquid and solids into a clean 1-quart glass jar. Cover and let stand at room temperature for 1 week, shaking the jar once daily.
  4. Strain the water mixture through a cheesecloth-lined funnel set over a clean 1-quart glass jar; discard the solids. If necessary, strain again to remove any remaining sediment. Add the infused alcohol and the syrup. Cover and let stand at room temperature for 3 days. Pour the bitters through a cheesecloth-lined funnel or strainer and transfer to glass dasher bottles. Cover and keep in a cool, dark place.
So far my bitters have been aging for a little over four weeks.  I think I'll skip parts 3 and 4 and just let them macerate for four weeks and strain thoroughly before adding a bit of water and maple syrup.